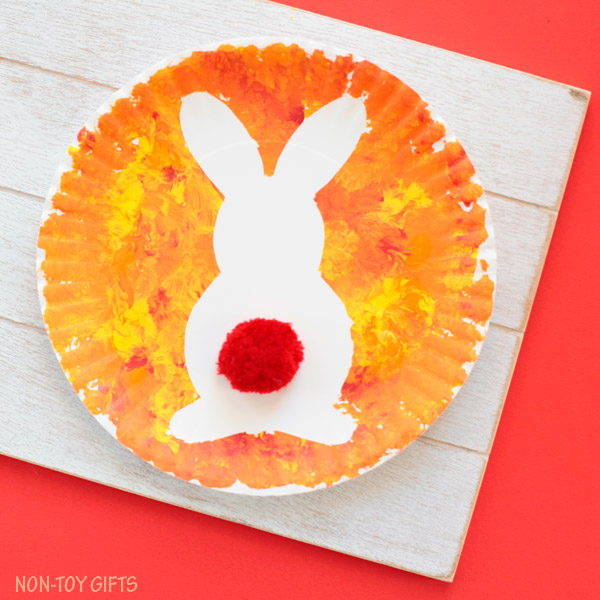
If you like paper plate animals and cute bunny crafts, this paper plate bunny craft is perfect to make with kids for Easter or any spring day.
The easy painting technique makes it a fun Easter craft for preschoolers. With a little help toddlers can make this Easter bunny too.

With their long ears and fluffy tails, bunnies are fun craft subjects. Especially now, with Easter just a month away.
Last year we used paper rolls to make a few cute bunnies. This year we’re going for a paper plate bunny craft.
More bunny crafts for kids:
The bunny turned out so adorable that we’re planning to hang it over the fireplace as decoration. My 3-year old was in charge of creating it and he did a wonderful job.
We experimented pom pom painting for the first time with our paper plate Earth and used the same technique now, too.
MORE PAPER PLATE CRAFTS:
It’s just so easy and fun. I bet you’ll see it again in our crafts.
Paper plate bunny craft
For more spring ideas, check out these 15 paper plate spring crafts or our entire collection of easy spring crafts.


This post contains affiliate links. I may receive commissions for purchases made through links in this post at no cost to you.
Supplies:
- free bunny template – enter your email at the end of this article to get the template
- paper plate
- contact paper
- scissors
- paint (3 colors)
- pom pom
- wooden clothespin
- big red pom pom
- glue
How to make a paper plate bunny craft


Step 1: Download the bunny template (find it at the end of the article), print it on paper and cut it out.
Trace the bunny shape on contact paper, cut it out and stick in in the middle of the paper plate.


Step 2: Squeeze paint onto the paper plate, around the bunny. We used 3 colors: yellow, red and orange only because we had a red pom pom for tail and wanted the background to match the pom pom. But you can use any other colors.


Step 3: Pinch the pom pom with a clothespin and use it to spread the paint onto the paper. Tap and make dots with the pom pom until you have covered the entire paper plate.


Step 4: Once you are done painting, peel off the contact paper.
TIP: Don’t wait for the paint to dry out before you peel off the contact paper. Instead do it right after you’re done painting even if this means you’ll get your fingers dirty while doing it.
Step 5: Glue the pom pom at the bottom of the bunny.


Paper plate bunny craft
An easy paper plate bunny craft for preschoolers and older kids to make for Easter or any spring day.
Materials
- paper plate
- contact paper
- paint (3 colors)
- pom pom
- wooden clothespin
- big red pom pom
- glue
Tools
- scissors
Instructions
- Download the bunny template (find it at the end of the article), print it on paper and cut it out. Trace the bunny shape on contact paper, cut it out and stick in in the middle of the paper plate.
- Squeeze paint onto the paper plate, around the bunny. We used 3 colors: yellow, red and orange only because we had a red pom pom for tail and wanted the background to match the pom pom. But you can use any other colors.
- Pinch the pom pom with a clothespin and use it to spread the paint onto the paper. Tap and make dots with the pom pom until you have covered the entire paper plate.
- Once you are done painting, peel off the contact paper.
- Glue the pom pom at the bottom of the bunny.
Notes
TIP: Don’t wait for the paint to dry out before you peel off the contact paper. Instead do it right after you’re done painting even if this means you’ll get your fingers dirty while doing it.
Sign up for our Newsletter and get this Bunny Template as a thank you!
