Let’s add a paper penguin craft to our collection of winter friends. All we need for this craft is paper and a template. Of course you can draw your own version of the penguin on paper and cut it out but for your convenience, I created a template. This will make it really easy to create penguins in the classroom. And it will also save you time when crafting at home with your little one.


We love penguin crafts. One of our favorites is the shape penguins that serve a double purpose. They will keep kids entertained creating these cute black and white South Pole animals. At the same time, the penguins will help children review their shapes. Aren’t educational crafts the best?


Winter crafting wouldn’t be complete without a few snowmen. So once you’re done making our cute paper penguin craft, check out these snowman ideas, as well as the rest of our collection of easy crafts for kids.

Now, let’s get some paper and start crafting.
Paper penguin craft

This post contains affiliate links. I may receive commissions for purchases made through links in this post at no cost to you.
Supplies:
- Paper penguin template
- Construction paper: black, blue, white, orange, red and yellow
- Black marker
- Scissors
- Glue


How to make the paper penguin craft
The penguin template comes with two versions:
1. Option 1 – print the template, cut out the patterns and trace them on appropriate colored paper
2. Option 2 – print the pattern directly on colored paper and cut them out.
This way you can easily craft with just one or two kids as well as with a classroom full of students.
Step by step instructions


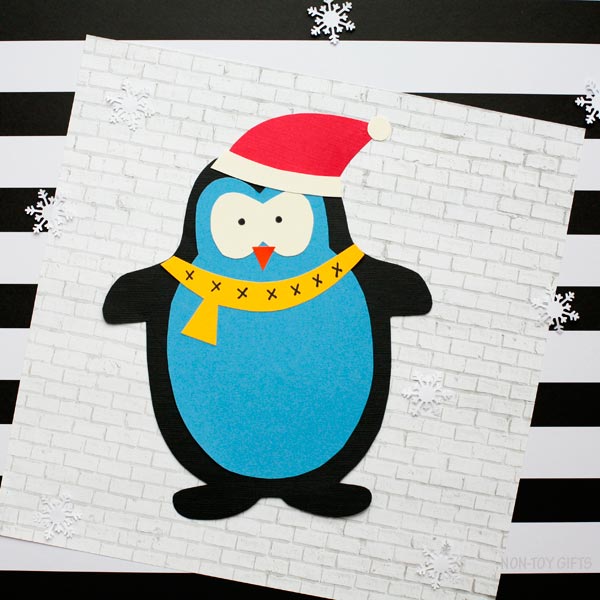
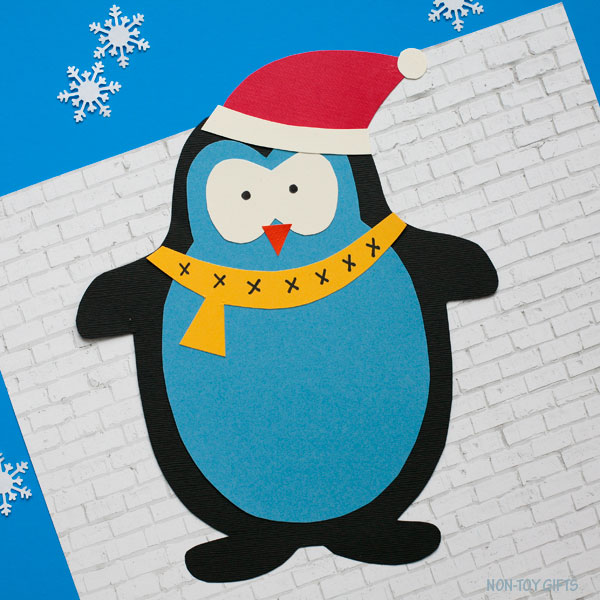
To make the paper penguin craft, you will need: 1 black penguin body, 1 blue body detail, 1 white face detail, 1 yellow scarf, 1 red hat, 1 white hat band and 1 hat pom pom.


Start by gluing the blue body piece on top of the black body.


Add the white face detail.


Glue the beak at the bottom of the white piece.


The yellow scarf comes around the neck.


Time to assemble the hat. Let’s start with the red hat that is glued on top of the penguin’s head.


Add the white hat band at the bottom of the hat.


And the white hat pom pom goes at the top of the hat.


Use a black marker to draw the penguin’s eyes and a scarf pattern.


Paper Penguin Craft
A fun winter penguin craft for kids. Make with just paper and our easy penguin template.
Materials
- Paper penguin template
- Construction paper: black, blue, white, orange, red and yellow
- Black marker
- Glue
Tools
- Scissors
Instructions
1. Start by gluing the blue body piece on top of the black body.
2. Add the white face detail.
3. Glue the beak at the bottom of the white piece.
4. The yellow scarf comes around the neck.
5. Time to assemble the hat. Let’s start with the red hat that is glued on top of the penguin’s head.
6. Add the white hat band at the bottom of the hat.
7. The white hat pom pom goes at the top of the hat.
8. Use a black marker to draw the penguin’s eyes and a scarf pattern.