Which are your favorite Dr. Seuss’s characters? The Cat In The Hat and Green Eggs And Ham are the first books that introduced my kids and me to Dr Seuss’s world. So Thing 1 and Thing 2 are definitely among our favorite characters. Today we’re going to create a Thing 1 and Thing 2 craft to go along with the book.


These two trouble making guys will make a nice addition to our Dr Seuss craft collection. Thing 1 and Thing 2 windsocks are still our favorites though last year we created a shape Cat in the hat and it one turned out so adorable.


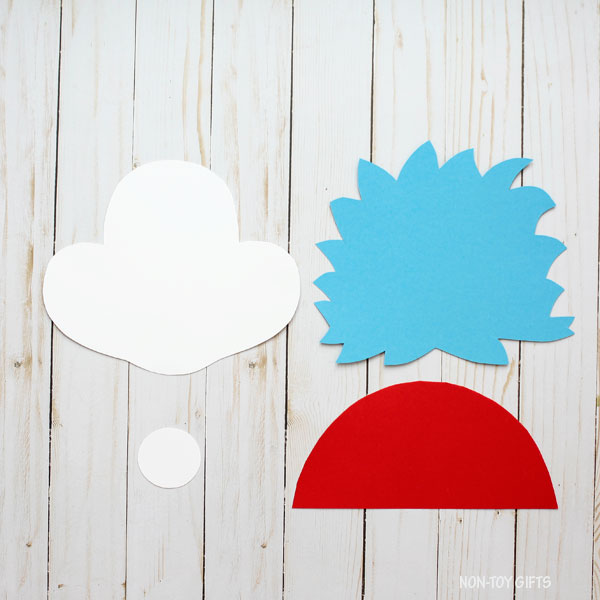
Some of our crafts come with templates and this is one of them. You can use it or you can draw your own. Our template is a very simple one, made up of just four patterns. Kids will cut them out and glue them together to create Thing 1 or Thing 2 or both of them.
We love easy crafts (check out our collection of simple crafts for kids) and paper crafts are the best. They make great classroom crafts that require no prep work.
Thing 1 and Thing 2 craft


This post contains affiliate links. I may receive commissions for purchases made through links in this post at no cost to you.
Supplies:
- Thing 1 and Thing 2 template
- Construction paper: white, blue and red
- 12″x 12″ Black card stock paper
- Black marker
- Googly eyes
- Scissors
- Glue


How to make the Thing 1 and Thing 2 craft
The Thing 1 and Thing 2 template comes with two versions:
1. home template – print the template, cut out the patterns and trace them on corresponding paper.
2. classroom template – print the pattern directly on colored paper and cut them out.
This way you can easily craft with just one or two kids as well as with a classroom full of students.
STEP BY STEP DIRECTIONS FOR HOME CRAFTING
Print the home template. Cut out the patterns and trace them on construction paper.
To make Thing 1 and Thing 2 you will need 1 red body, 1 white face, 1 blue hair and 1 white circle.

Start by gluing the white face on top of the blue hair.


Glue the red body at the bottom of a black 12″ x 12″ card stock paper.


Add the head with hair on top of the body.


Last thing to glue is the white circle that goes on the red body, under the face.


Use a black marker to draw the nose and mouth and write THING 1 or THING 2 on the white circle.


Glue the google eyes above the nose.
STEP BY STEP DIRECTIONS FOR CLASSROOM CRAFTING
Print the classroom template on corresponding colored paper. The body is printed on red paper, the hair on blue paper, the head and circle on white paper.
To make Thing 1 and Thing 2 each student will need 1 red body, 1 white face, 1 blue hair and 1 white circle.
Start by gluing the white face on top of the blue hair.
Glue the red body at the bottom of a black 12″ x 12″ card stock paper.
Add the head with hair on top of the body.
Last thing to glue is the white circle that goes on the red body, under the face.
Use a black marker to draw the nose and mouth and write THING 1 or THING 2 on the white circle.
Glue the google eyes above the nose.