This apple basket craft is a great kids fall craft, it can be used as a learning tool and will help preschoolers and kindergartners practice their fine motor skills. Yes, it’s a 3 in 1 craft. 🙂


I love taking my boys to apple orchards and each weekend I try to make time for such a visit.
We all play together, or the kids play and I enjoy some time with my hubby, we go for tractor rides, tackle the corn maze, if there is one, drink apple cider and eat apple donuts or caramel apples.
Before leaving we pick up our own apples or if we feel lazy, we’ll buy some from the orchard’s store.


These days, people don’t pick apples in a basket anymore but still an apple basket is a fall symbol and we had to add one to our kids fall craft collection.
MORE FALL CRAFTS FOR KIDS


You can use this apple basket craft to teach kids about apples and apple parts. You can count the apples that go in the basket. Or sort the apples by color.
We are big fans of paper plate crafts.
We use them a lot throughout the year and sometimes we pair them with yarn to turn them into interactive crafts, like this paper plate veggie garden (a popular spring craft) or this paper plate ocean craft (a popular summer craft).

Threading yarn through holes in a paper plate helps young kids with eye hand coordination. This is yet a simple task that will keep kids focused and will introduce them to sewing.

Apple basket craft variations
- Instead of using yarn to make the basket, you can use two paper plates. Cut out the second paper plate in half and paint the back brown. Staple it to the front bottom of the first paper plate.
2. You can use our template (find it at the end of the post) to make the apples or you can try apple stamping.
Cut an apple in half, apply green, red or yellow paint to it and press it onto a white cardstock paper. Wait for the paint to dry out completely and then cut out your apples. Trace a stem on brown paper and a leaf on green paper. Cut them out and start assembling your apples.
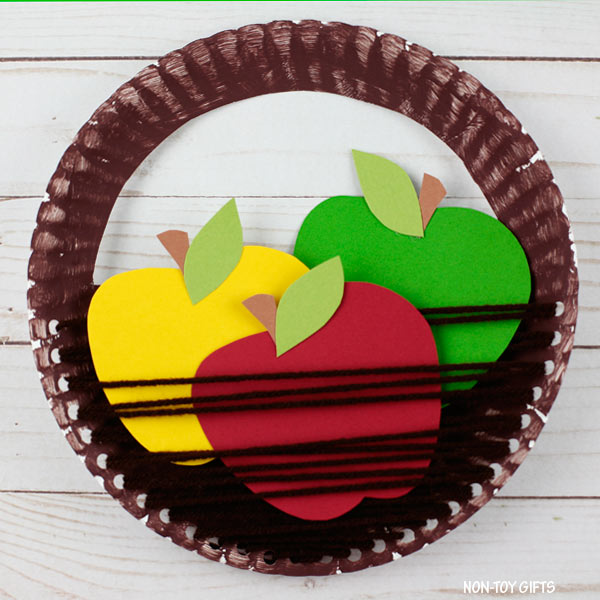
Apple basket craft


This post contains affiliate links. I may receive commissions for purchases made through links in this post at no cost to you.
Supplies:
- Apple template – find it at the end of the post
- Paper plate
- Brown craft paint
- Brown yarn
- Construction paper: red, yellow, green and brown
- Plastic yarn needle
- Paintbrush or sponge brush
- Hole punch
- Scissors
- Glue
How to make a basket full of apples craft
Start by painting a paper plate brown. Set it aside to dry completely.
While waiting , you can go ahead and download the apple template (find it at the end of the article), cut out the stem, leaf and apple patterns and trace them on colored paper.


Make red, yellow and green apples. Glue the stems onto the apples and the leaves on top of the stems.
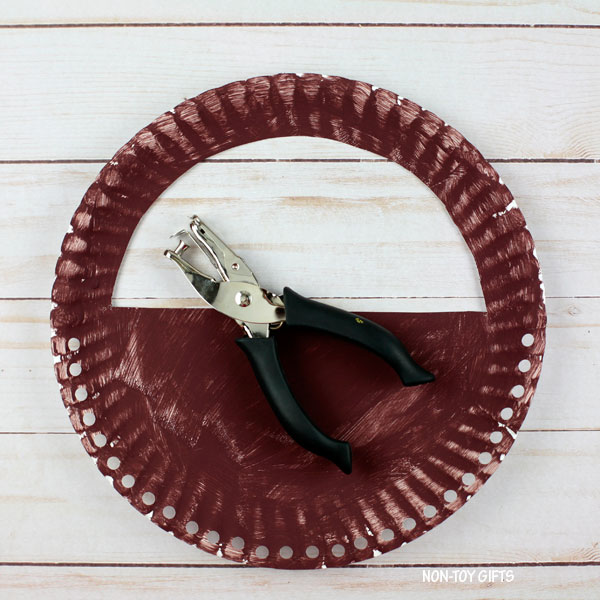
Turn the paper plate upside down and trace half a circle at the top of the plate. Cut it out.
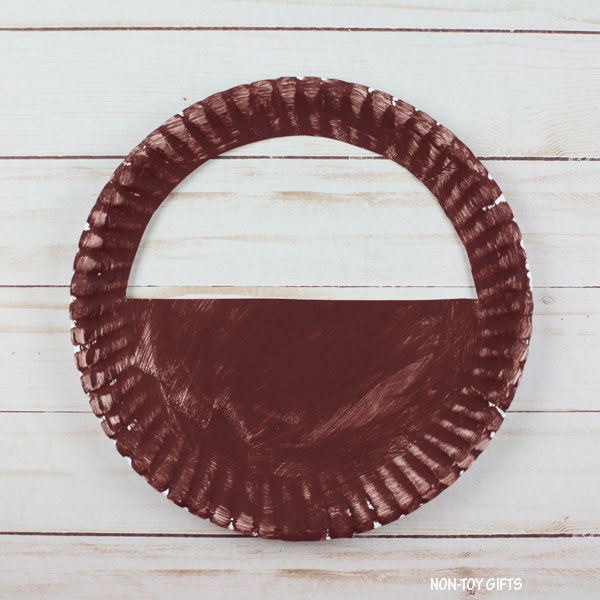

Use a hole punch to make holes along the bottom of the paper plate.

Cut a strand of brown yarn, thread it through a plastic yarn needle and tie one end to the needle. Tape the other end of the yarn at the back of the paper plate. You can now start threading the yarn through the holes in the paper plate.
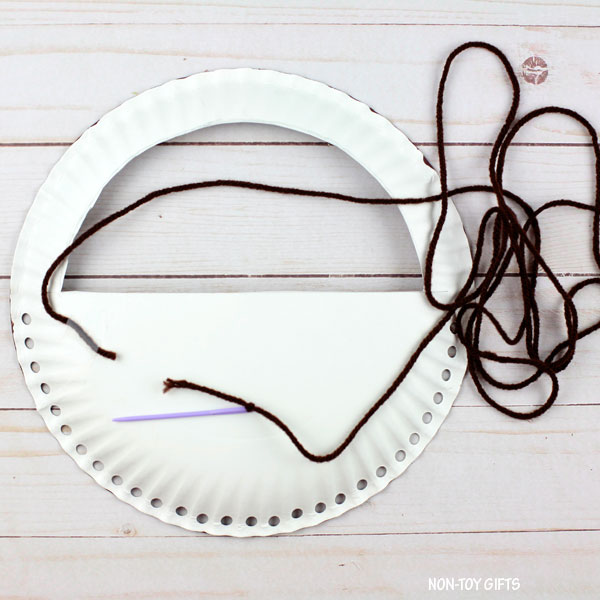

Go through all the holes one time, making sure that the yarn lines are straight.


When you thread a second time through the holes, you want to make diagonal lines, like in the picture below. This way the threading looks nice and thick.
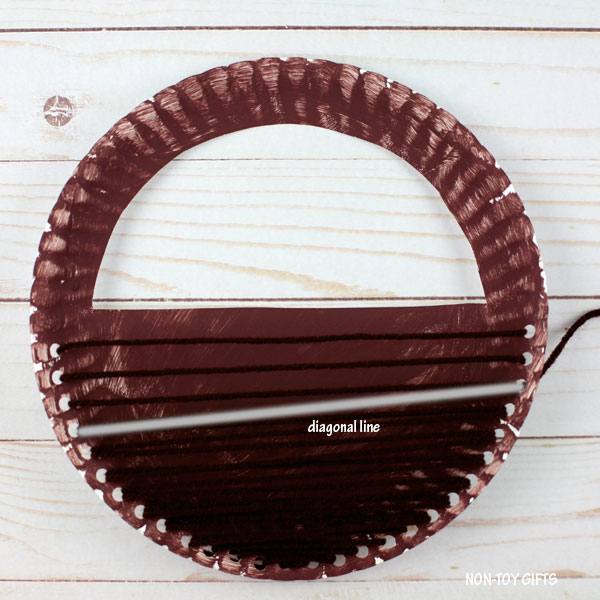

When you reach the end of the yarn, secure it to the back of the paper plate with tape. If you’re not done threading, cut another strand of yarn and keep on going till you cover all the holes.
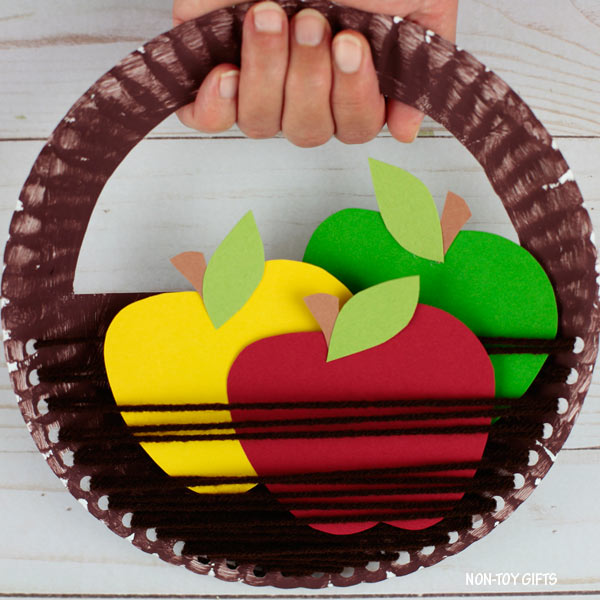
Now you can pick apples in your basket. Isn’t this craft just perfect for an orchard visit play pretend?


Apple Basket Craft Kids
Make a beautiful apple basket craft using paper plate, yarn and the printable template. Perfect for kids' play pretend or use it as a learning tool for preschoolers and kindergartners.
Materials
- Apple template - find it at the end of the post
- Paper plate
- Brown craft paint
- Brown yarn
- Construction paper: red, yellow, green and brown
- Glue
Tools
- Plastic yarn needle
- Paintbrush or sponge brush
- Hole punch
- Scissors
Instructions
- Start by painting a paper plate brown. Set it aside to dry completely.
- While waiting , you can go ahead and download the apple template (find it at the end of the article), cut out the stem, leaf and apple patterns and trace them on colored paper.
- Make red, yellow and green apples. Glue the stems onto the apples and the leaves on top of the stems.
- Turn the paper plate upside down and trace half a circle at the top of the plate. Cut it out.
- Use a hole punch to make holes along the bottom of the paper plate.
- Cut a strand of brown yarn, thread it through a plastic yarn needle and tie one end to the needle. Tape the other end of the yarn at the back of the paper plate. You can now start threading the yarn through the holes in the paper plate.
- Go through all the holes one time, making sure that the yarn lines are straight.
- When you go a second time through the holes, you want to make diagonal lines. This way the threading looks nice and thick.
- When you reach the end of the yarn, secure it to the back of the paper plate with tape. If you're not done threading, cut another strand of yarn and keep on going till you cover all the holes.
Recommended Products
As an Amazon Associate and member of other affiliate programs, I earn from qualifying purchases.