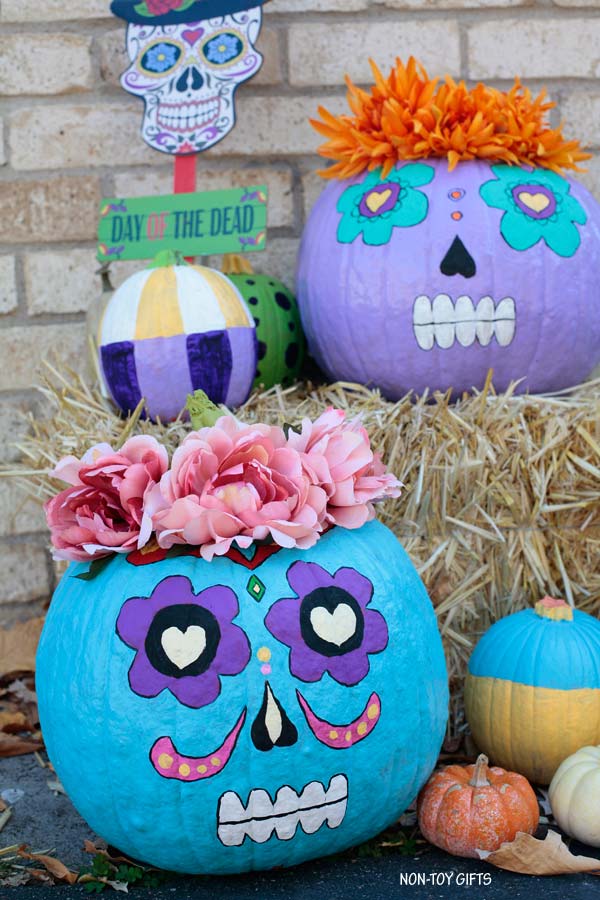
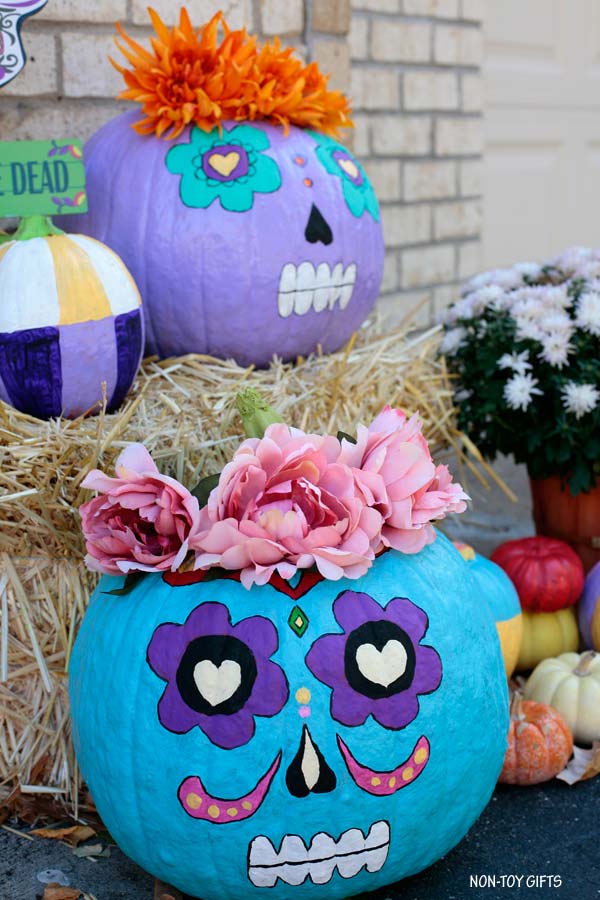
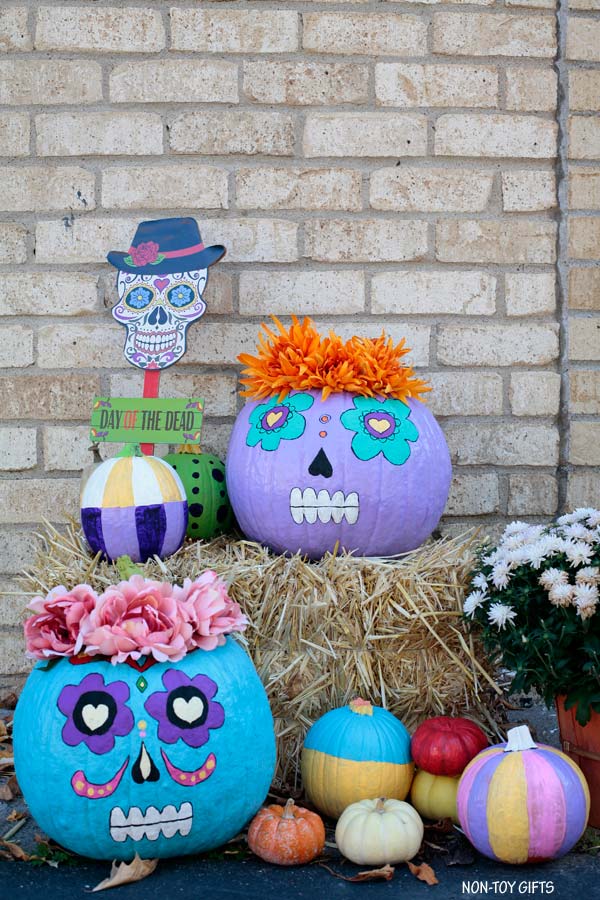
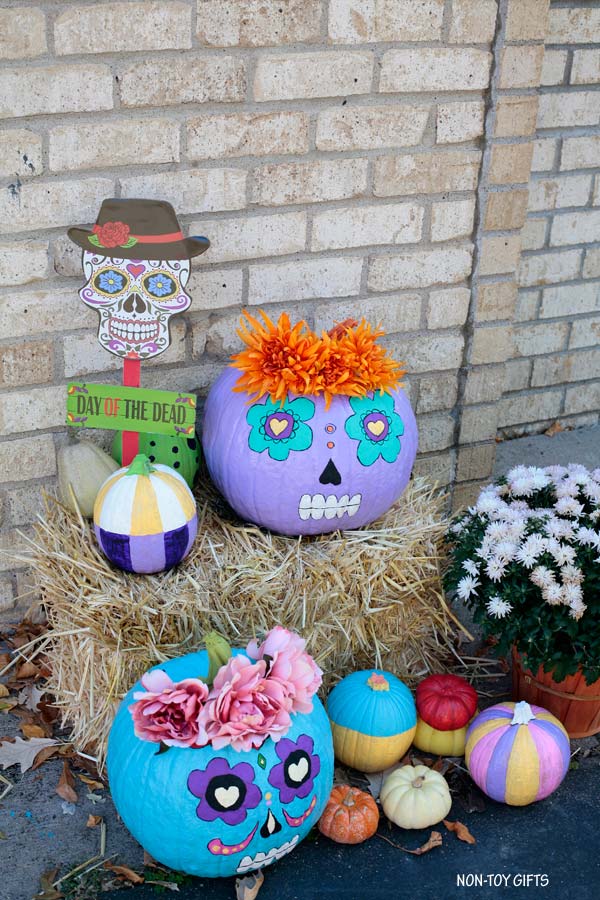
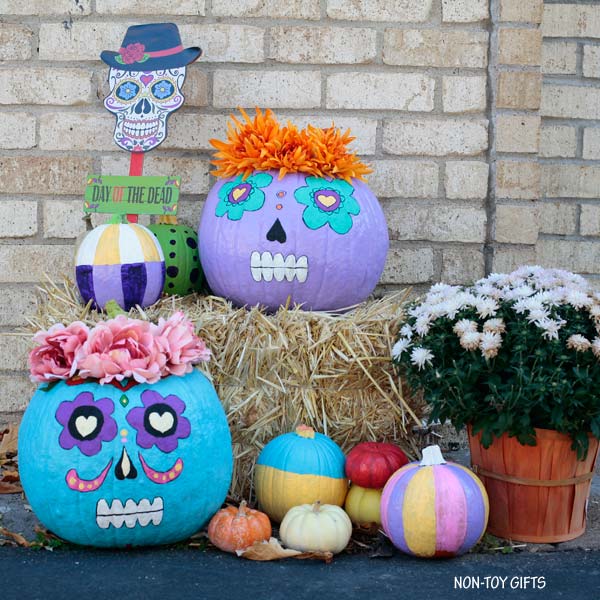
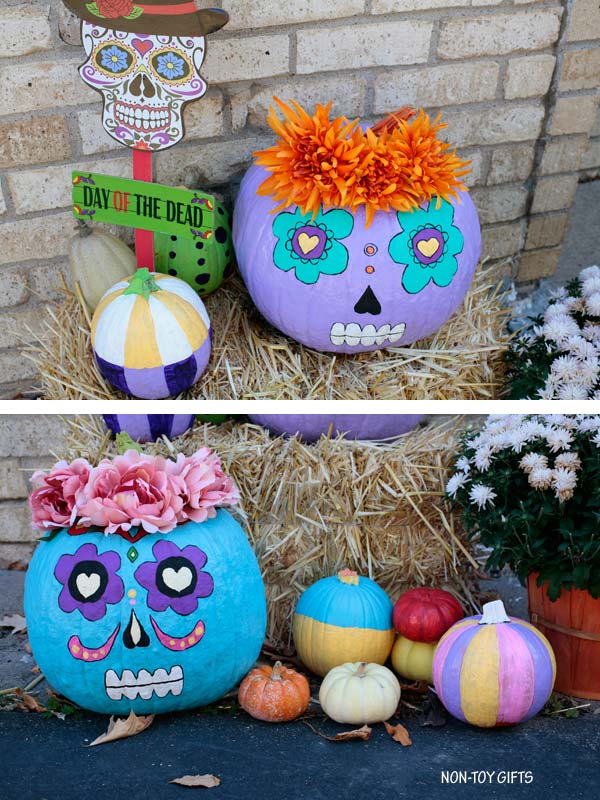
These painted Day of the Dead pumpkins are great to celebrate Dia de los Muertos. No carving tools needed for this craft, just paint and plastic flowers.
I usually share kids crafts but these Day of the Dead pumpkins are more for adults as it requires fine detail painting. Of course kids can help, maybe with painting the background, once you are done with the face.
If your kids like painting pumpkins too, take a look at these 25 painted pumpkins for kids. I’m sure they will find a beautiful idea they will like to try.
Once you’re done with your pumpkins, make sure to make this Day of the Dead craft with your little ones.
While we don’t celebrate Dia de los Muertos, because this year I started learning Spanish and it’s also my oldest son’s first year learning Spanish, I decided to paint some Day of the Dead pumpkins.
I love painting and have been doing it for years. It’s only lately that my boys ask to also carve some. But this doesn’t mean that I gave up painting pumpkins. The week before Halloween I buy a couple more pumpkins for carving.
If it’s a nice warm October day, I go outside on the deck and do the painting there. Otherwise, I’ll take over the kitchen island.
This year I asked my girlfriends if they want to come over and do some pumpkin painting together. We had a blast! We may even turn it into an annual tradition.
Day of the Dead pumpkins
This post contains affiliate links and I will be compensated if you make a purchase after clicking on my links.
Supplies:
- Pumpkins
- Fine black sharpie
- Acrylic paint
- Paint brushes
- Plastic flowers
- Hot glue
Note: You will need good quality paint brushes, like these ones. Use three different sizes, medium for the eyes, mouth and nose, big size for the rest of the pumpkin and fine paint brush for the details and the black lines.
How to paint Day of the Dead pumpkins
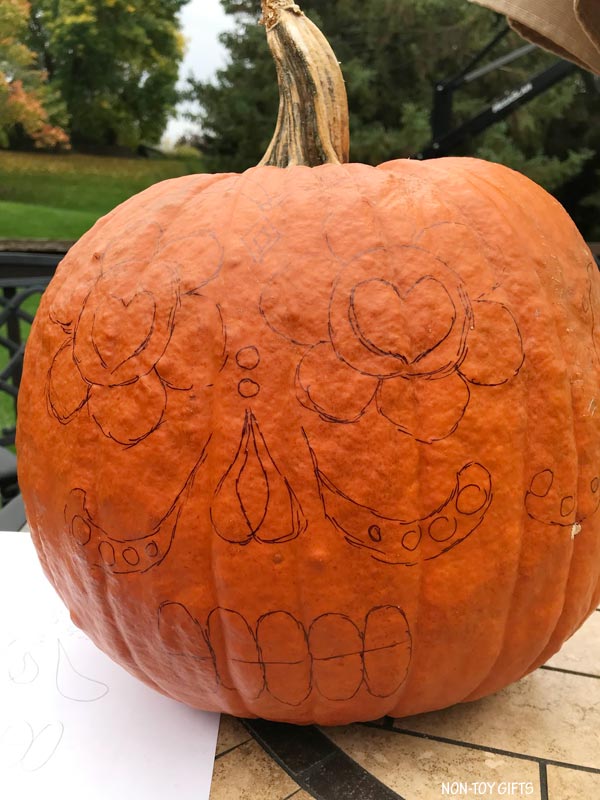
Start by drawing a sugar skull on paper and then copy it onto the pumpkin with a fine black sharpie. Once you apply two paint coats, you won’t be able to see the marker lines anymore, so don’t worry about that.
Paint the eyes, nose and mouth.

Move on to finer details of your sugar skull.
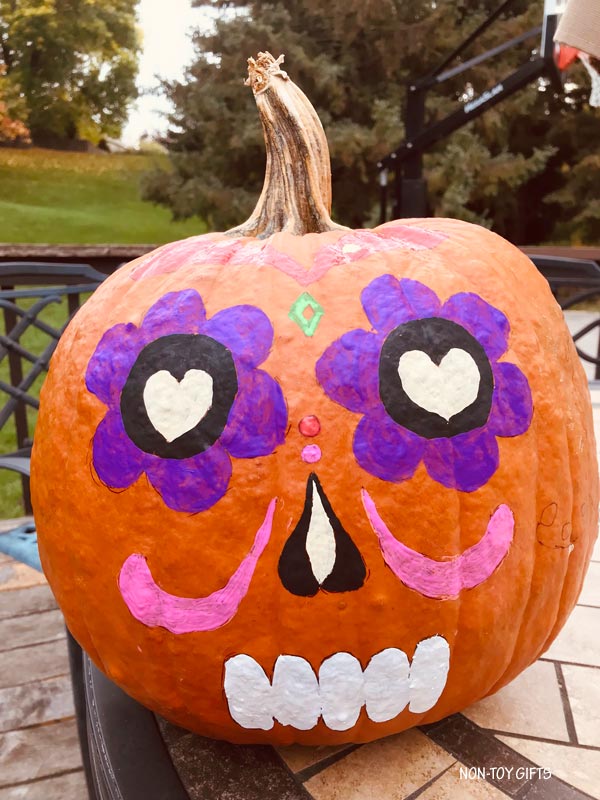
Paint the rest of the pumpkin. Start with the back because this way by the time you get to the face, the paint may have already dried.
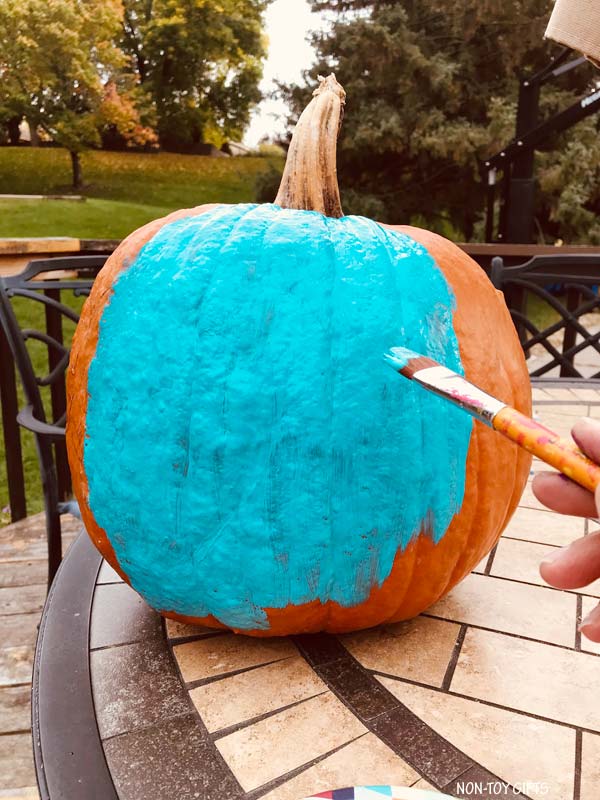
When all the paint has dried completely, apply a second coat of paint, for the sugar skull as well as the rest of the pumpkin.
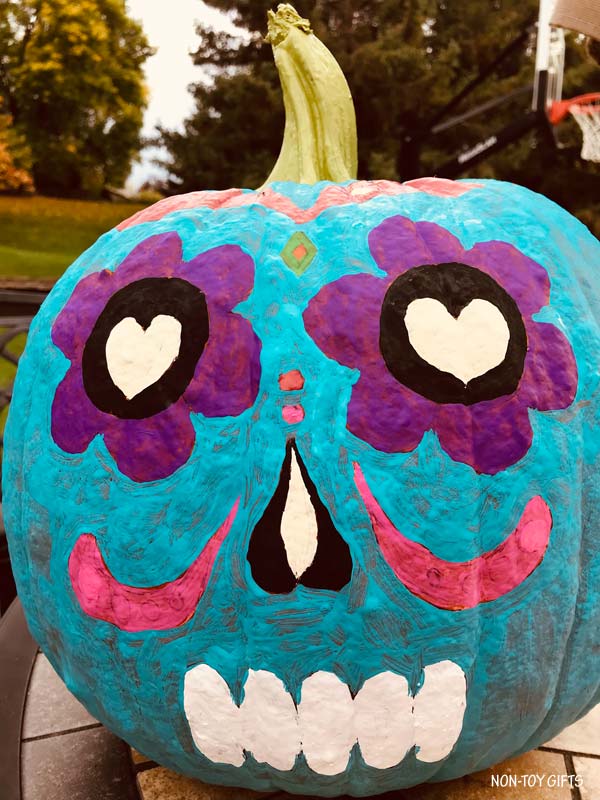
Wait for the paint to dry completely and se a fine paint brush to draw the lines (around eyes, mouth and other decorations).
Glue three plastic flowers at the top of the pumpkin.