Let’s make an easy Santa craft to celebrate the most beloved person in the world.
Our collection of Christmas crafts include several Santa Claus crafts created with paper plates, yarn, a wooden spoon and shapes. The easy Santa we’re sharing today comes with a template and it’s really simple to make.
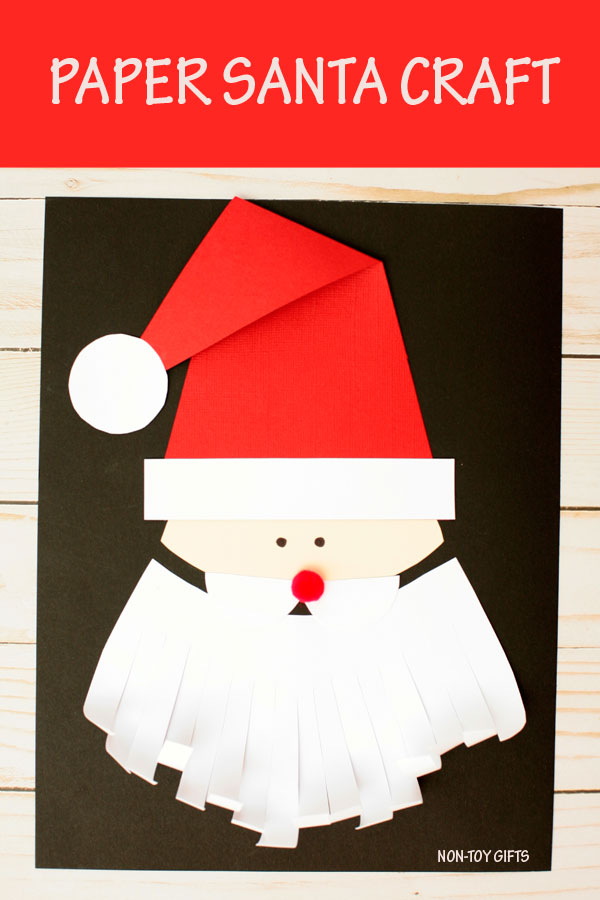

We gave Santa a curly beard and he couldn’t look more adorable! The only non paper element we used to create the craft is a small red pom pom for the nose. The rest is all paper, which makes it a perfect Santa craft for preschoolers or kindergartners who want to practice their scissors cutting skills.
You can pair this Santa with one of our Christmas trees or another craft of your choice. Just take a peek at our collection of easy crafts for kids.


My oldest is very determined for this year to be the year when he catches Santa. He’s thinking of all sorts of strategies and leaving his tablet filming over night in front of the Christmas tree seems to be the winner.
He’s in first grade and still believes in Santa. I love it! And I try to hold on to this for as long as possible.
I have to use my imagination and come up with all sorts of ideas to explain why some of his older friends claim Santa isn’t real. So far so good! Let’s see how I will do this Christmas.


Easy Santa craft


This post contains affiliate links. I may receive commissions for purchases made through links in this post at no cost to you.
Supplies:
- Easy Santa craft template
- black card stock paper
- red, ivory and white construction paper
- small red pom pom
- black marker
- scissors
- glue


How to make an easy Santa craft
The template comes with two versions: one home version, when you get to craft with one or two kids and a classroom version, that makes it easier when crafting with several kids. Go ahead and print either the home or classroom version of the template and let’s get crafting.
Step by step directions for home crafting
Print the home version of the template. Cut out the face and hat patterns and trace them on corresponding construction paper: the face on ivory paper and the hat on red paper. No worries if you don’t have ivory paper, you can give Santa a white face, too. It’s just that by using ivory paper, you give the face a nice color contrast against the white beard, mustache and hat brim.
Cut out the rest of the patterns ( beard, mustache, hat brim and hat pom pom) and use them as is.
Start by gluing the face in the middle of the black card stock paper.


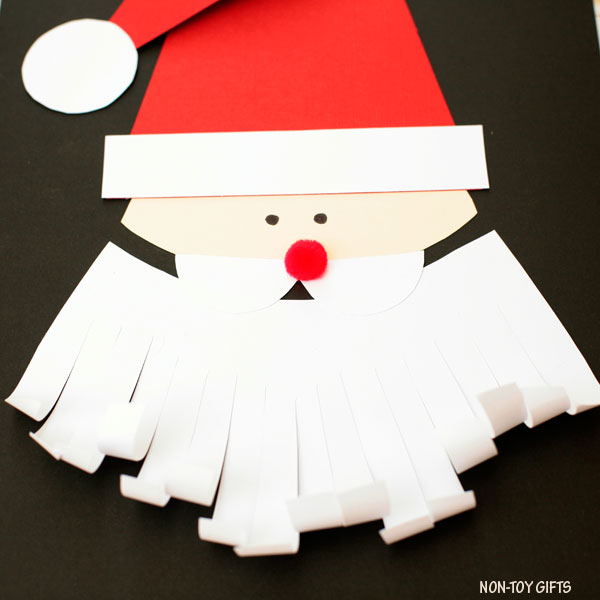
Make 3″ slits up the Santa beard. Use a pencil to wrap the ends of the paper beard strips around it and up to give the beard a curly look. Glue the beard onto the black card stock paper, underneath the face.


Glue the red triangle hat on top of the face and fold the top. Add the white paper pom pom to the end of the hat. Finish the hat with the white rectangle that comes at the bottom of the hat.


Cut the mustache circle in half and glue the two halves at the bottom of the ivory face.
Glue a small red pom pom where the two circle halves come together.


Use a black marker to draw two little eyes.
Step by step directions for classroom crafting
Print the classroom version of the template on corresponding colored paper. The beard, hat brim, hat pom pom and mustache are printed on white paper. The triangle hat is printed on red paper and Santa’s face on ivory paper. No worries if you don’t have ivory paper, you can give Santa a white face, too. It’s just that by using ivory paper, you give the face a nice color contrast against the white beard, mustache and hat brim.
To make the Santa craft, each student needs to cut out 1 white beard, 1 white mustache, 1 ivory face, 1 red hat, 1 white hat brim and 1 white hat pom pom.
Start by gluing the face in the middle of the black card stock paper.
Make 3″ slits up the Santa beard. Use a pencil to wrap the ends of the paper beard strips around it and up to give the beard a curly look. Glue the beard onto the black card stock paper, underneath the face.
Glue the red triangle hat on top of the face and fold the top. Add the white paper pom pom to the end of the hat. Finish the hat with the white rectangle that comes at the bottom of the hat.
Cut the mustache circle in half and glue the two halves at the bottom of the ivory face.
Glue a small red pom pom where the two circle halves come together.
Use a black marker to draw two little eyes.