A while back we made a day and night craft. Now we want to separate the two and create two different crafts for kids: a day craft with a fun sun and a night craft with a sleepy moon. We’re starting with the moon craft that is perfect for preschool and kindergarten. It has big shapes to cut by little hands and a fun template.


The moon can’t be on its own in the sky, so we added a star, too. At least this was the original plan because in the end, the big yellow star was surrounded by several smaller white stars. While the small stars are not part of our template, you can use star stickers. We made our stars with a help of a punch.
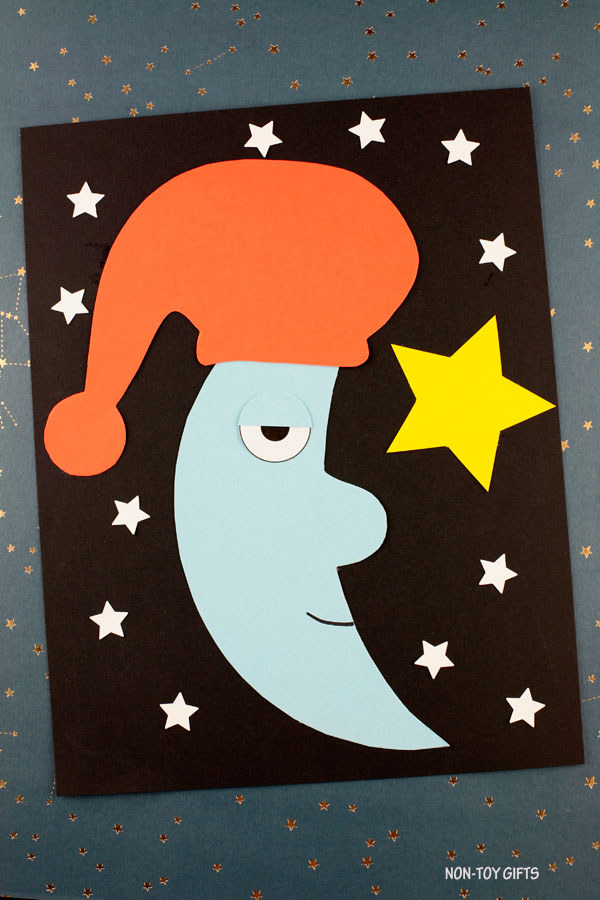

We gave our moon a sleepy look with an eye halfway closed and a night bonnet. You will have to explain to kids where the bonnets come from as these days nobody wears them anymore to go to bed. They may have seen one in A Christmas Coral, as Scrooge wears one.
Moon craft


This post contains affiliate links and I will be compensated if you make a purchase after clicking on my links.
Supplies:
- Moon template
- Construction paper: white, yellow, light blue and another color of your choice
- Black card stock paper
- Black marker
- Scissors
- Glue
- Star stickers or star punch (optional)


How to make a moon craft
The moon template comes with two versions:
1. home template – cut out the patterns and trace them on corresponding colored paper.
2. classroom template – print the pattern directly on colored paper and cut them out.
This way you can easily craft with just one or two kids as well as with a classroom full of students.
STEP BY STEP DIRECTIONS FOR HOME CRAFTING
Print the home template, cut out the patterns and trace them on corresponding colored paper. While you can use the eye as is, the moon and eyelid need to be traced on light blue paper, the star on yellow paper and the hat on a color paper of your choice.
To make the moon craft you will need 1 light blue moon, 1 light blue eyelid, 1 eye and 1 hat.


Start by gluing the moon in the middle of a black cardstock paper.
Glue the hat onto the moon.
Add the eye.
Glue the eyelid on top of the eye.


Glue the star in front of the moon, onto the black cardstock paper.
Use a black marker to draw a smile.
STEP BY STEP DIRECTIONS FOR CLASSROOM CRAFTING
Print the classroom template on corresponding colored paper. The moon and eyelid are printed on light blue paper, the star on yellow paper, the eye on white paper and the hat on the color of your choice.
Follow the same steps as above.