A beautiful yarn and paper plate Christmas tree craft for kids that can be used as a holiday decoration at home or in the classroom.
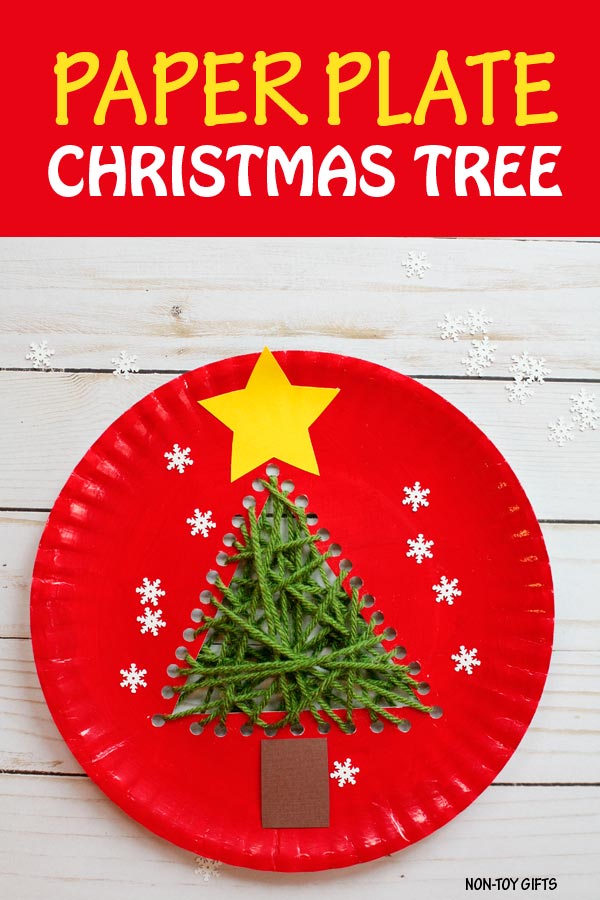

This paper plate Christmas tree craft gave my kids the opportunity to use a plastic yarn needle for the first time. It was their first sewing project and a big hit. Great for practicing their fine motor skills and create an easy Christmas craft.
If you want to try more yarn and paper plate Christmas crafts, take a look at this paper plate Santa or these paper plate Grinch’s hearts.


We love Christmas crafts and have made quite a few Christmas tree crafts for the holidays. These trees combine paper plates with paper strips, while this construction paper Christmas tree has a 3D shape.
RELATED: Check out these 30 Christmas tree crafts for kids.
If you want to skip the painting part, you can start the craft with a red paper plate instead of a white one. Waiting for the paint to dry takes a while and we may not always have the time for it.
But if your kids love painting, like mine, you can focus their attention towards drawing and cutting out the star and tree trunk, while the paint dries. This will take them a while, and it may be just enough for the paper plate to be ready.

If you are a teacher, you can use this craft in the classroom with preschoolers and kindergartners. Put it on your list of Christmas classroom party crafts or holiday classroom decoration.
Paper plate Christmas tree craft
This post contains affiliate links. I may receive commissions for purchases made through links in this post at no cost to you.
Supplies:
- Christmas tree template – find it at the end of the article
- paper plate
- red paint
- paint brush
- scissors
- pencil
- hole punch
- green yarn
- plastic yarn needle
- cardstock paper: yellow and brown
- glue
How to make the yarn and paper plate Christmas tree
Find the printable instructions at the end of the post.Step 1: Start by painting your paper plate red. Let it dry completely. You can also start with a red paper plate and skip this step.
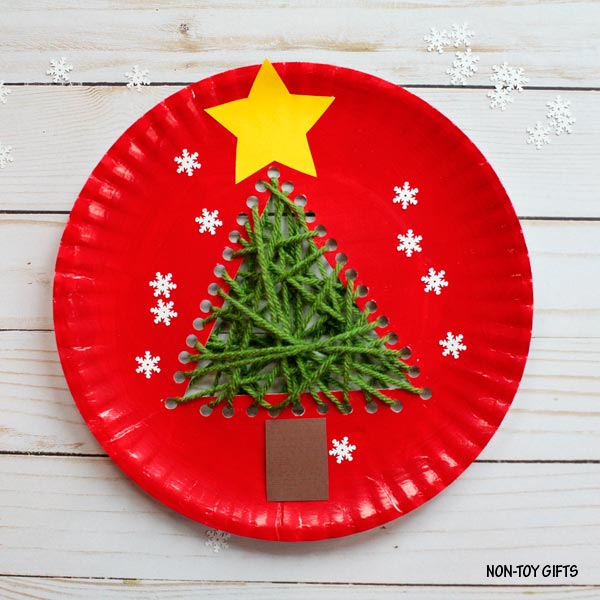
Step 2: Download the Christmas tree template, cut out the triangle pattern and trace it in the middle of the paper plate. Cut out the triangle.


Step 3: Make holes along the three sides of the triangle .
Cut a big strand of yarn, thread it through the plastic yarn needle and tie one end to the needle. Secure the other end of the yarn at the back of the paper plate with tape. You can now start threading the green yarn through the holes in the paper plate. Continue until you reach the end of your yarn.
If you haven’t threaded through all the holes, you can cut another strand of yarn and do the same as with the first. (Tie one end to the needle and secure the other hand to the paper plate).
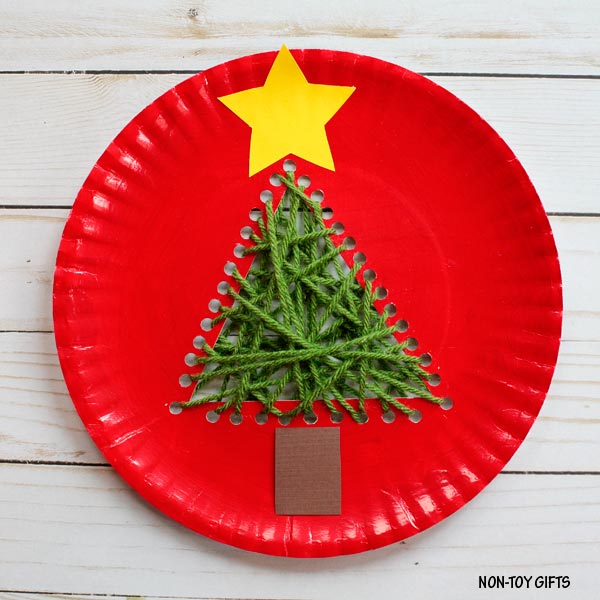

Step 4: Cut the tree trunk from brown cardstock paper and glue it to the bottom of the tree. Add the yellow cardstock paper star to the top of your Christmas tree.
An easy Christmas tree craft for kids that uses a paper plate and yarn. As an Amazon Associate and member of other affiliate programs, I earn from qualifying purchases.

Paper plate Christmas tree craft for kids
Materials
Tools
Instructions
Cut a big strand of yarn, thread it through the plastic yarn needle and tie one end to the needle. Secure the other end of the yarn at the back of the paper plate with tape. You can now start threading the green yarn through the holes in the paper plate. Continue until you reach the end of your yarn. If you haven't threaded through all the holes, you can cut another strand of yarn and do the same as with the first one. (Tie one end to the needle and secure the other hand to the paper plate). Recommended Products
Sign up for our Newsletter and get this Christmas Tree Template as a thank you!


