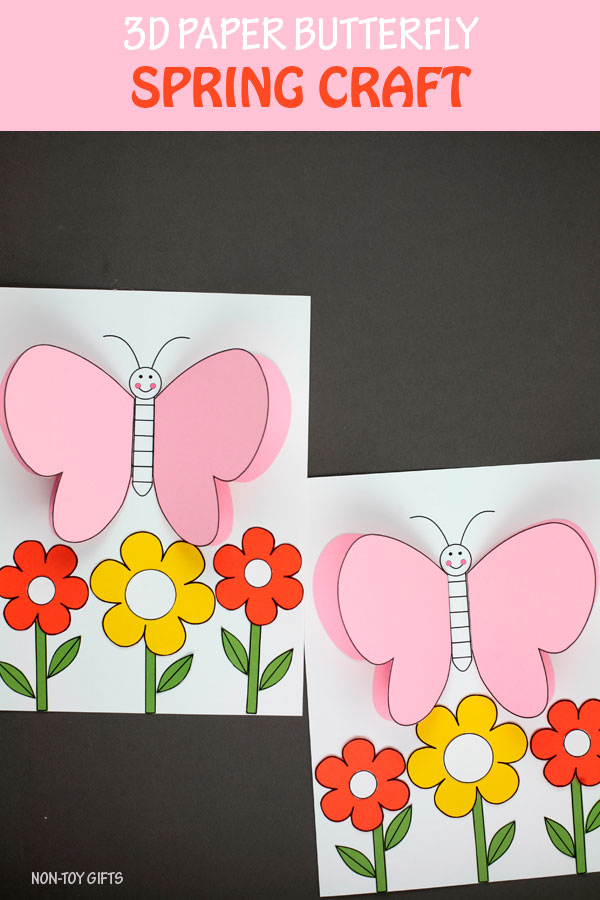
Butterfly crafts are one of the most popular spring crafts for kids, and this easy butterfly craft is perfect for preschool and elementary students. Kids create a colorful 3D butterfly craft using simple printable templates. This butterfly craft printable is great for spring lessons, insect units, or fun craft time at home.

Download the Butterfly Craft Template
Preschoolers who are eager to exercise their scissors cutting skills, will love making this butterfly and flowers. The craft leaves room to creativity and kids can color or paint the butterfly body and glue small pom poms or buttons at the end of the antennae.
For more craft ideas, check out our spring craft collection.


Having a butterfly garden has been a dream of mine for years. After learning how to grow my veggies from seeds and how to convince bunnies not to eat my tulips and other flowers in front of the house (all these took years of trail and error), I’m finally ready for my butterfly garden. I hope we will have lots of beautiful butterflies in our backyard this summer.
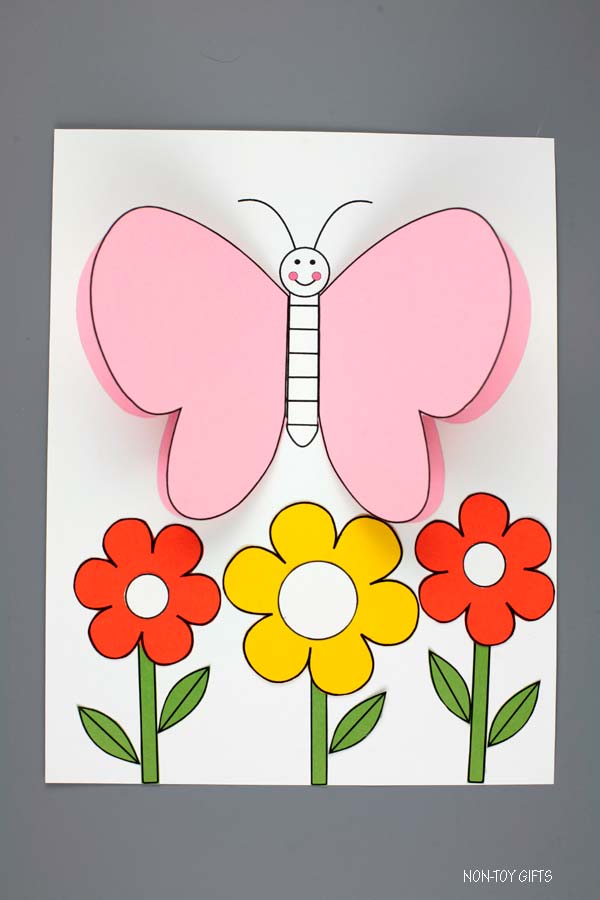
3D Paper butterfly craft


Supplies:
- 3D butterfly template
- White cardstock paper
- Construction paper: pink, yellow, orange, white and green
- Scissors
- Glue
- Crayons and small pom poms (optional)
How to make the 3D paper butterfly craft
The butterfly template comes with two versions:
1. home template – print the template, cut out the patterns and trace them on corresponding paper.
2. classroom template – print the pattern directly on colored paper and cut them out.
This way you can easily craft with just one or two kids as well as with a classroom full of students.
Step by step for home crafting
Print the home template, cut out the patterns and trace them on corresponding colored paper. The body is printed on white cardstock paper and used as is.
To make the 3D butterfly craft you will need 1 body printed on white cardstock paper, 2 pink wings, 2 small orange flowers, 1 big yellow flower, 2 small white pistils, 1 big white pistil, 2 small green stems and 1 big green stem and 5 green leaves.


Start by cutting out the two wings and fold them in half.


Apply glue on one half of the wing and add it next to the butterfly body. Glue the other wing on the other side of the body.


Add three green stems at the bottom of the cardstock paper.
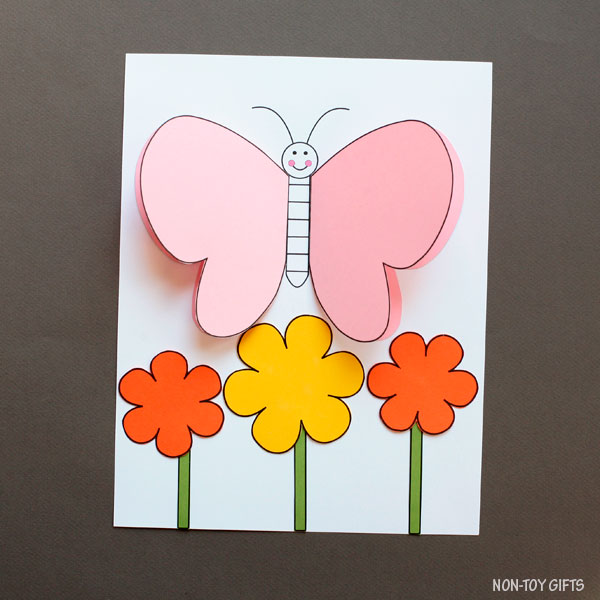

Glue 2 orange flowers and 1 yellow flowers on top of the green stems.
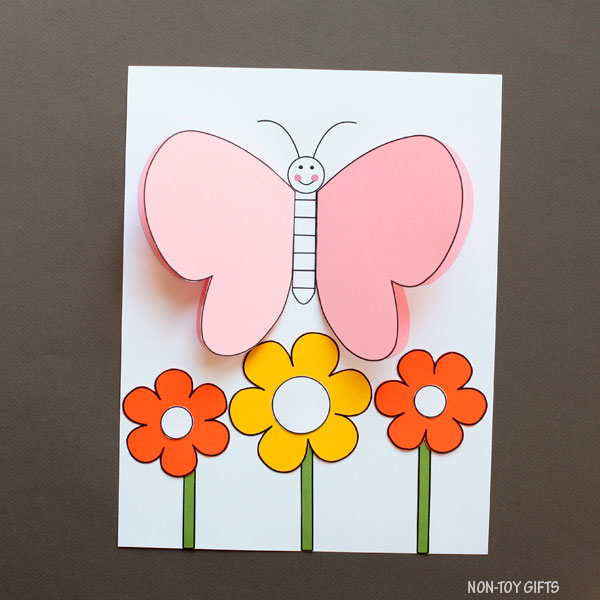

Add the white pistils in the middle of the flowers. One pistil for each flower.


Glue the leaves.
Step by step for classroom crafting
Print the classroom template on corresponding colored paper. The body is printed on white cardstock paper. The wings are printed on pink paper, the big flower on yellow paper, the small flowers on orange paper, the pistils (big and small) on white paper and the leaves and stems on green paper.
To make the 3D butterfly craft each student will need 1 body printed on white cardstock paper, 2 pink wings, 2 small orange flowers, 1 big yellow flower, 2 small white pistils, 1 big white pistil, 2 small green stems and 1 big green stem and 5 green leaves.
Start by cutting out the two wings and fold them in half.
Apply glue on one half of the wing and add it next to the butterfly body. Glue the other wing on the other side of the body.
Add three green stems at the bottom of the cardstock paper.
Glue 2 orange flowers and 1 yellow flowers on top of the green stems.
Add the white pistils in the middle of the flowers. One pistil for each flower.
Glue the leaves.