We have been making quite a few Earth crafts lately and I thought it would be a good idea to add a nice kid-made art decor to the mix. This is how I came up with this handprint Earth Day art project. Both my boys helped with the project and we have it now displayed above the fireplace.
It can be a fun Earth Day classroom activity for all the kids to make together or individually.
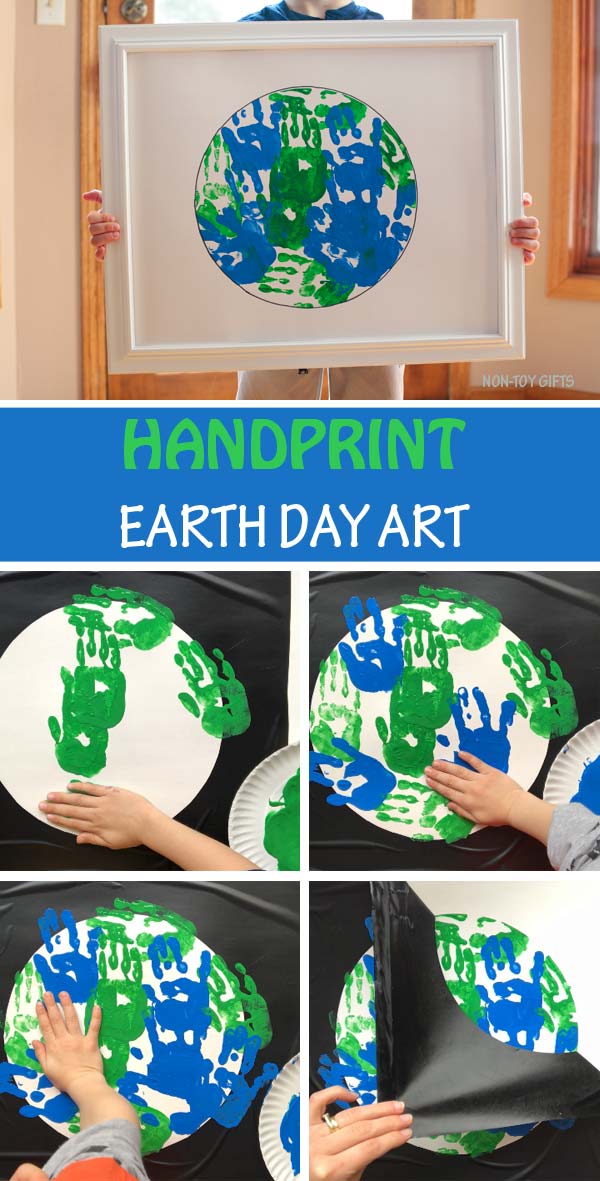

Handprint Earth Day art project
We have used a lot of paper plates to create Earth Day crafts and I love them all. Unfortunately we can’t keep all the crafts we create. I take photos of them and make yearly albums. After that all our crafts end up in the trash.
But this handprint Earth Day art project is a keeper. Not only it looks great but I love having a handprint seasonal art to display every year.
MORE EARTH DAY CRAFTS FOR KIDS:


This post contains affiliate links. I may receive commissions for purchases made through links in this post at no cost to you.
How to make the Handprint Earth Day Art Project
Supplies:
- white cardstock paper
- contact paper
- green and blue craft paint
- black marker
- pencil
- scissors
Step 1: Start by deciding how big you want your Earth art to be and cut out the white cardstock paper.
We have a white frame that we usually use for our kids holiday crafts that go above the fireplace so I wanted our project to fit this frame.


Step 2: Cut out enough contact paper to fit your cardstock paper and use a big round container (we used a big plastic bowl) to draw a circle in the middle of the contact paper.
Cut out the circle and stick the contact paper to the cardstock paper. Here is a trick to make it easier to have the contact paper centered on the cardstock paper.
Use your big round container to draw a circle in the middle of the white cardstock paper. When sticking the contact paper onto the white paper, try to align the two circles.
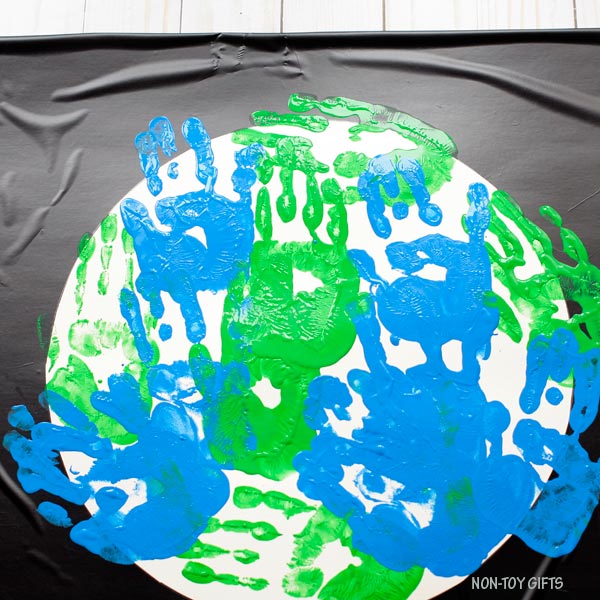

Step 3: Now it’s time to create the Earth with green and blue handprints.

Step 4: Once Earth has been created, peel off the contact paper. Do it right away, rather than wait until the paint has dried. Otherwise there is a chance that paint from your Earth will peel off together with the contact paper.
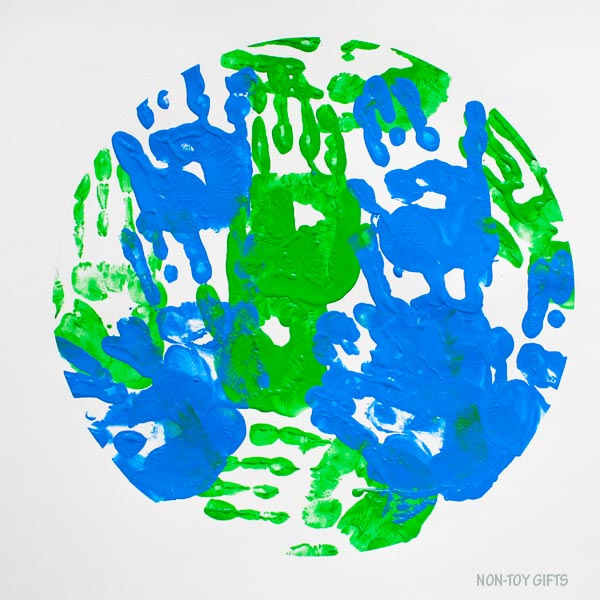
Step 5: Once the paint is dried, use a black marker to outline Earth’s round shape.


Handprint Earth Day art project
Make a beautiful handprint art for Earth Day
Materials
- white cardstock paper
- contact paper
- green and blue craft paint
- black marker
- pencil
Tools
- scissors
Instructions
Start by deciding how big you want your Earth art to be and cut out the white cardstock paper. We have a white frame that we usually use for our kids holiday crafts that go above the fireplace so I wanted our project to fit this frame.
Cut out enough contact paper to fit your cardstock paper and use a big round container (we used a big plastic bowl) to draw a circle in the middle of the contact paper. Cut out the circle and stick the contact paper to the cardstock paper. Here is a trick to make it easier to have the contact paper centered on the cardstock paper. Use your big round container to draw a circle in the middle of the white cardstock paper. When sticking the contact paper onto the white paper, try to align the two circles.
Now it's time to create the Earth with green and blue handprints.
Once Earth has been created, peel off the contact paper. Do it right away, rather than wait until the paint has dried. Otherwise there is a chance that paint from your Earth will peel off together with the contact paper.
Once the paint is dried, use a black marker to outline Earth's round shape.