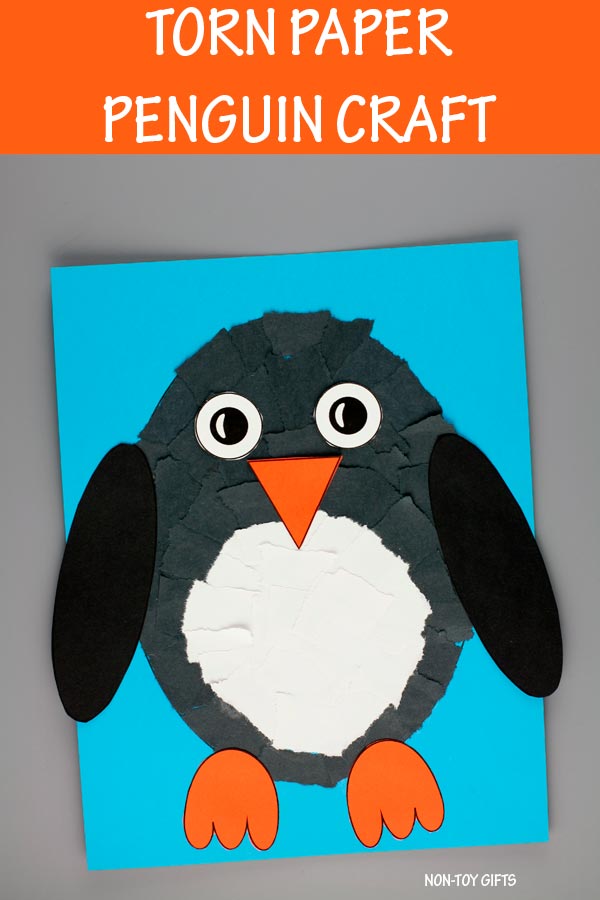
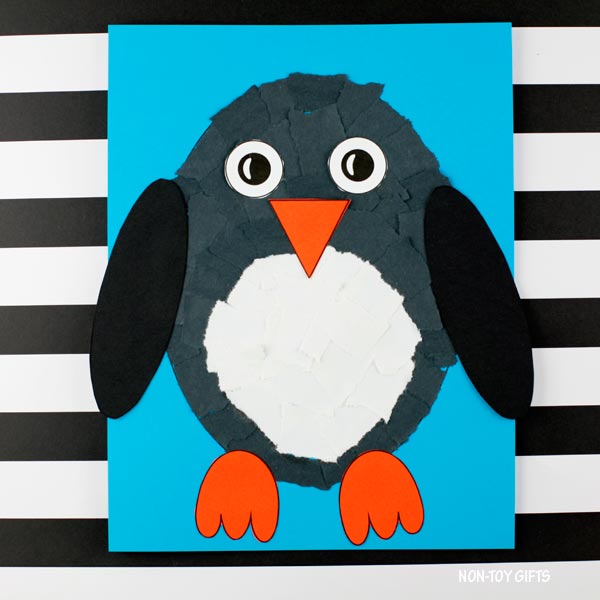
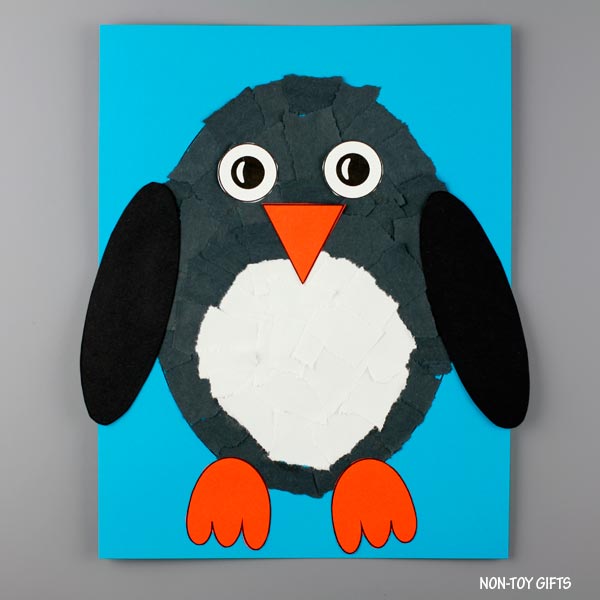
An adorable torn paper penguin craft kids can make on a winter day. Easy craft for toddlers, preschoolers as well as older kids.
In case you are a teacher, use this penguin craft in the classroom with your students for a winter animal study or an Antarctic animal themed unit.
You can also use it as a letter P (P is for penguin) craft.
Either way, this penguin is a beautiful bulletin board idea and a fun hallway or classroom display.
Of course you can also make this craft at home with your toddlers, preschoolers or older kids. They will practice their scissors cutting skills and working on their fine motor skills by tearing paper and gluing all the parts together to form the penguin.
Benefits of paper tearing
Tearing paper is not only an enjoyable activity, that may fulfill a sensory need in some kids, but it can also help in many ways:
- Kids will use their fine motor skills when ripping paper and this will help them with holding a pencil and writing.
- It takes a lot of concentration to tear paper into small pieces and this is a task that little ones can do independently.
- When torn paper is used in a craft like ours, it will spark kids’ imagination and encourage their creativity.
More torn paper crafts for kids:
Winter crafts for kids
You can continue your winter crafting with more penguins, like this paper plate and yarn penguin or these shape penguins, or switch to this hot chocolate craft – it comes with three mug options.
Torn paper penguin craft
This post contains affiliate links and I will be compensated if you make a purchase after clicking on my links.
Supplies:
- Penguin craft template
- Craft paper: white, black and orange
- Black cardstock paper for background
- Scissors
- Glue
How to make the torn paper penguin craft
The penguin template comes with two versions:
1. Option 1 – print template directly on colored paper
2. Option 2 – trace patterns on colored paper
This way you can easily craft with just one or two kids as well as with a classroom full of students.
Step by step instructions
Start by printing the page with the oval and circle on blue paper.
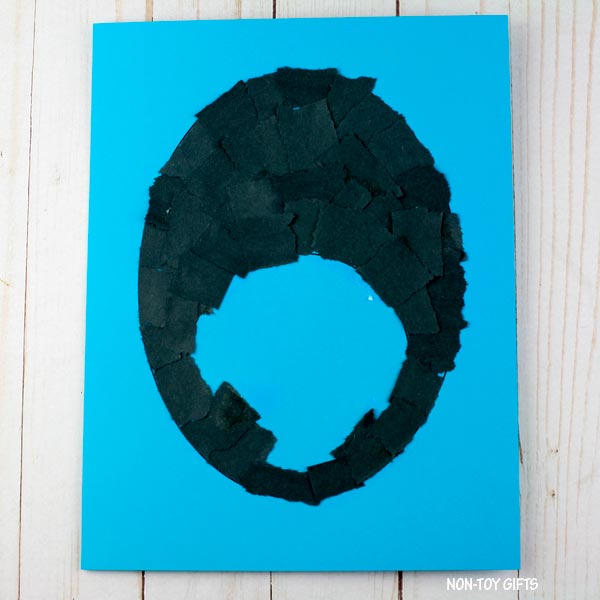
Glue torn black paper pieces inside the oval but not inside the circle.

Glue torn white paper pieces inside the circle.
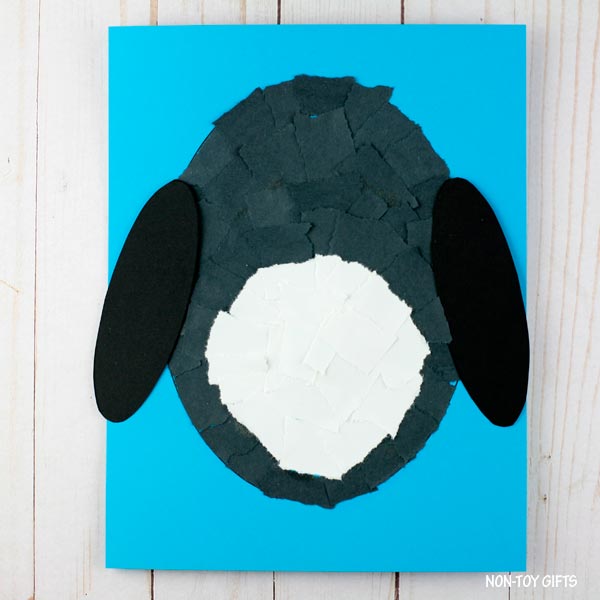
Add the flippers onto the body, one flipper on each side.
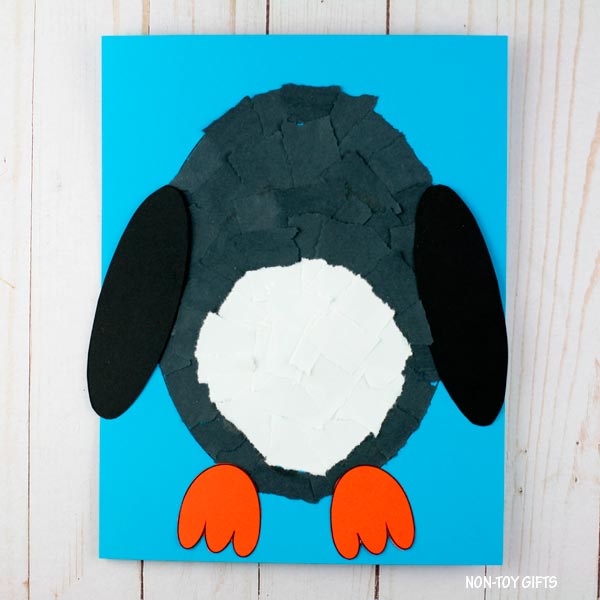
Glue the feet at the bottom of the body.
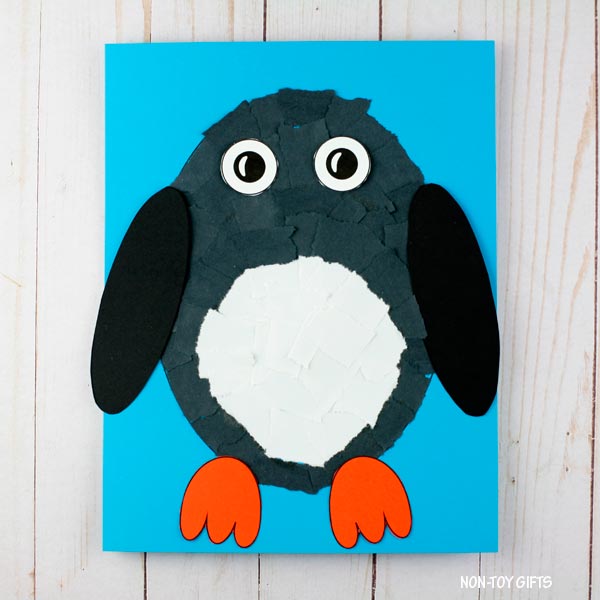
Glue the eyes at the top of the body, above the white circle.

Add the beak between the eyes and the white circle.