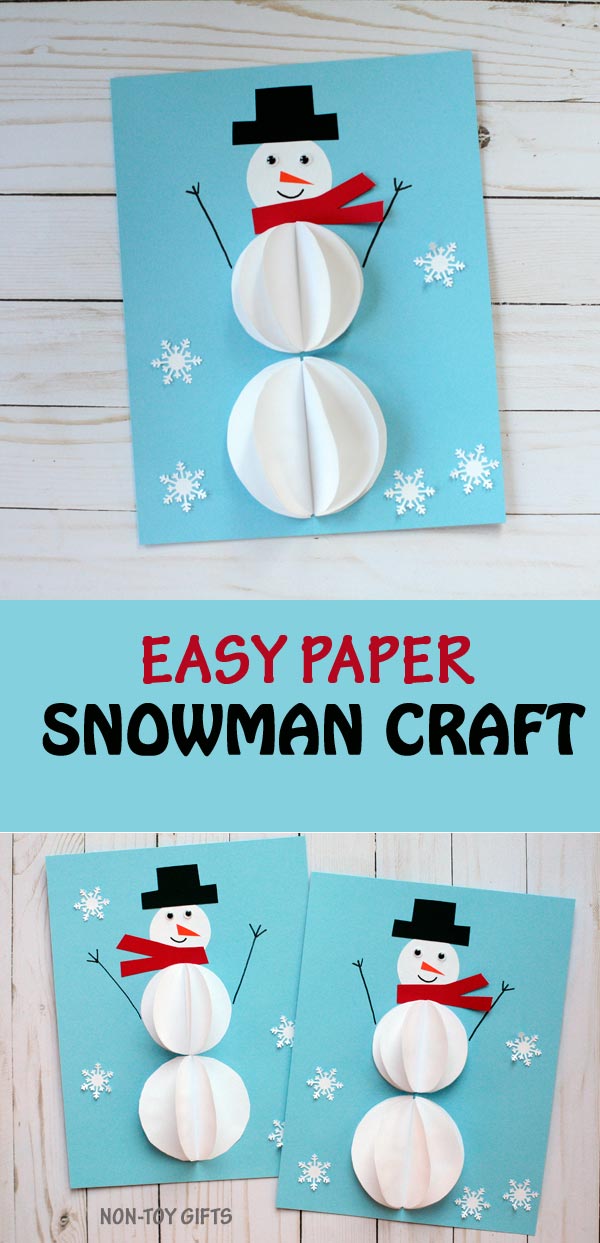
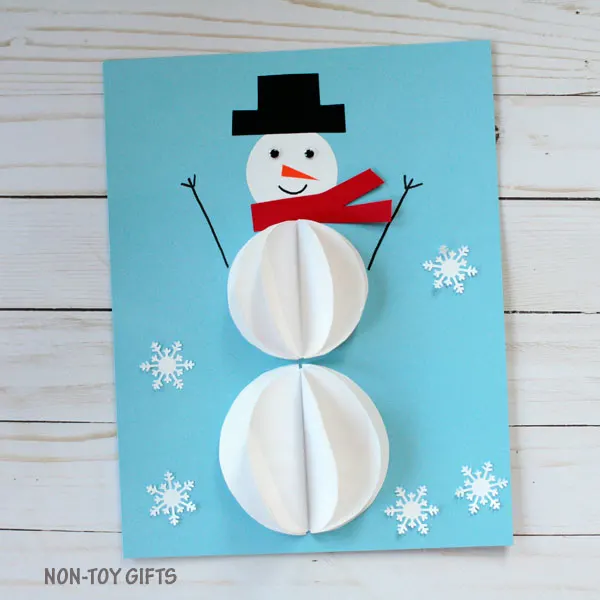
Use our free template to make a cute and easy 3D paper snowman craft for kids.
Christmas in July.
No, we don’t usually celebrate it but I signed the kids up to an art class where they painted a cute little reindeer on canvas. This led to Santa talk, snow nostalgia and gift wishing. So why not indulge my kids’ longing for Christmas time with a fun and easy paper snowman craft?
It was a hot summer day when we made these snowmen but we had so much fun. There were even requests for the movie ” Frosty the snowman”.

Because we use quite a few circles to make the snowman, this could lead to same more winter shape crafts or Christmas shape crafts, like this shape Santa, Shape elf or shape reindeer. Yes, we love shape crafts because it gives kids an opportunity not only to get creative but also helps them review some math.


Does it snow where you live? Do your kids build actual snowman outside?
We live in Minnesota and get plenty of snow here. We have long, cold winters (not as long or as cold as there used to be a few years ago, but still) and we enjoy outdoor snow activities.
But for the days when it’s too chilly to go outside, we have a nice collection of winter indoor activities and some snowman crafts.
3D paper snowman craft for kids

This post contains affiliate links. I may receive commissions for purchases made through links in this post at no cost to you.
Supplies:
- free Snowman template – find it at the end of the post
- construction paper (white, black, red and orange)
- blue cardstock paper
- 2 googly eyes
- snowflake punch
- glue
- scissors
- black marker
How to make an easy 3D snowman


Step 1: Print the snowman template (find it at the end of the post) and cut out the largest circle.
Fold a white construction paper in four and trace the circle on the folded paper. Cut out the 4 big circles and fold them in half. (I used 6 circles for one snowman and 4 for the other and they both look great)
Apply glue on one half on a circle and stick it to the bottom of a blue cardstock paper.
Apply glue to the other half and glue another folded circle on top. Do the same with the rest of the circles. Stick the last half of the last circle onto the blue cardstock paper.


Step 2: Cut out the middle circle and repeat the same steps as for the largest circle.


Step 3: Cut out the small circle and glue it on top of the snowman.
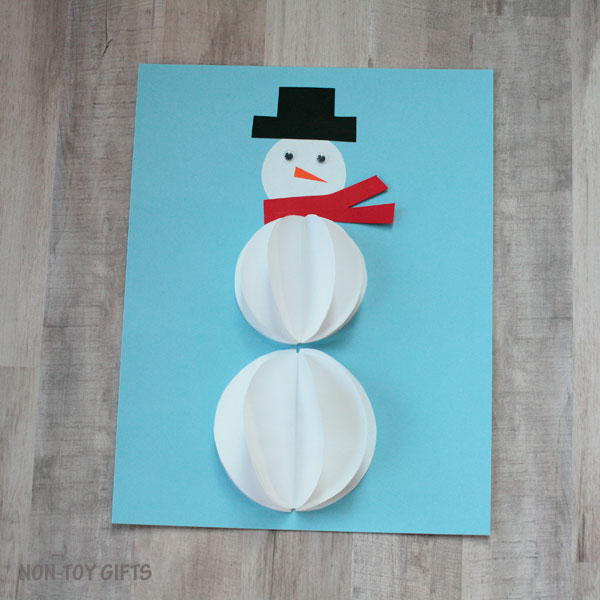

Step 4: Cut out the hat pattern, trace it on black paper and glue it on top of the snowman’s head. Cut the carrot nose out of orange construction paper and the red scarf and glue them to the snowman. You can draw the eyes or use small googly eyes. Use a black marker to draw a mouth and arms.
Step 5: (optional) Decorate with snowflakes. You will need a snowflake punch for this step. We love our snowflake punch and the kids use it a lot.
Use our free snowman template to make an easy and cute 3D snowman craft. What a fun winter craft for kids! We used six circles for one snowman and four for the second. As an Amazon Associate and member of other affiliate programs, I earn from qualifying purchases.

3D Paper Snowman Craft For Kids
Materials
Tools
Instructions
Notes
Recommended Products

